Lucid dreaming lets you become aware within your dreams, offering creative, emotional, and therapeutic benefits. Learn how to start lucid dreaming safely.
Lucid dreaming happens when you become aware that you’re dreaming while still inside the dream. This awareness gives you the unique ability to influence your dream’s environment, characters, and story — like directing your own personal movie in real time.
Some people experience brief moments of lucidity, while others can train themselves to gain full control, flying through the sky, solving problems, or exploring creative ideas while asleep.
The Science Behind It
Researchers link lucid dreaming to heightened activity in the prefrontal cortex, the part of your brain responsible for decision-making and self-awareness. During REM (rapid eye movement) sleep — the phase when most vivid dreams occur — the brain normally relaxes this region. But in lucid dreamers, it appears partially active, allowing for conscious thought inside the dream state.
Benefits of Lucid Dreaming
Creativity boost: Artists, writers, and musicians use lucid dreaming to generate ideas. Nightmare control: You can face fears directly, changing scary dreams into positive outcomes. Emotional healing: Revisiting memories or visualizing positive change can reduce anxiety. Skill practice: Athletes and performers report improved performance after practicing moves in lucid dreams. Exploration and curiosity: Many people simply enjoy the boundless freedom of dream worlds.
How to Induce Lucid Dreams
Reality checks: Ask yourself throughout the day, “Am I dreaming?” Look for clues — clocks that shift, text that changes, or strange logic. Dream journal: Write your dreams immediately after waking. This improves dream recall and awareness. Mnemonic Induction (MILD): Before sleep, repeat a phrase like, “Next time I’m dreaming, I’ll know I’m dreaming.” Wake Back to Bed (WBTB): Wake up after 5–6 hours of sleep, stay awake for 20 minutes, then go back to bed while focusing on dreaming consciously. Meditation and mindfulness: A clear, focused mind during the day makes lucidity more likely at night.
Risks and Considerations
Lucid dreaming is generally safe, but frequent practice can sometimes cause:
Sleep disruption from waking up too often Vivid or unsettling dream experiences Confusion between dream and waking memories (rare)
It’s important to maintain a healthy sleep schedule and practice grounding techniques if you ever feel disoriented upon waking.
Lucid Dreaming and the Future of Sleep Research
Modern neuroscience is exploring lucid dreaming for mental health therapy, especially for PTSD and recurrent nightmares. With advances in brain imaging and sleep tracking, scientists are finding new ways to interact with dreamers in real time — bridging the gap between consciousness and the dream world.
Final Thoughts
Lucid dreaming offers a fascinating bridge between imagination and awareness. Whether you want to conquer fears, boost creativity, or simply explore your subconscious, developing lucidity can open extraordinary dimensions of the mind — all from the comfort of your own bed.
What would you do if you realized you were dreaming tonight?
Pick up a Dream Journal on Amazon and track your dreams!
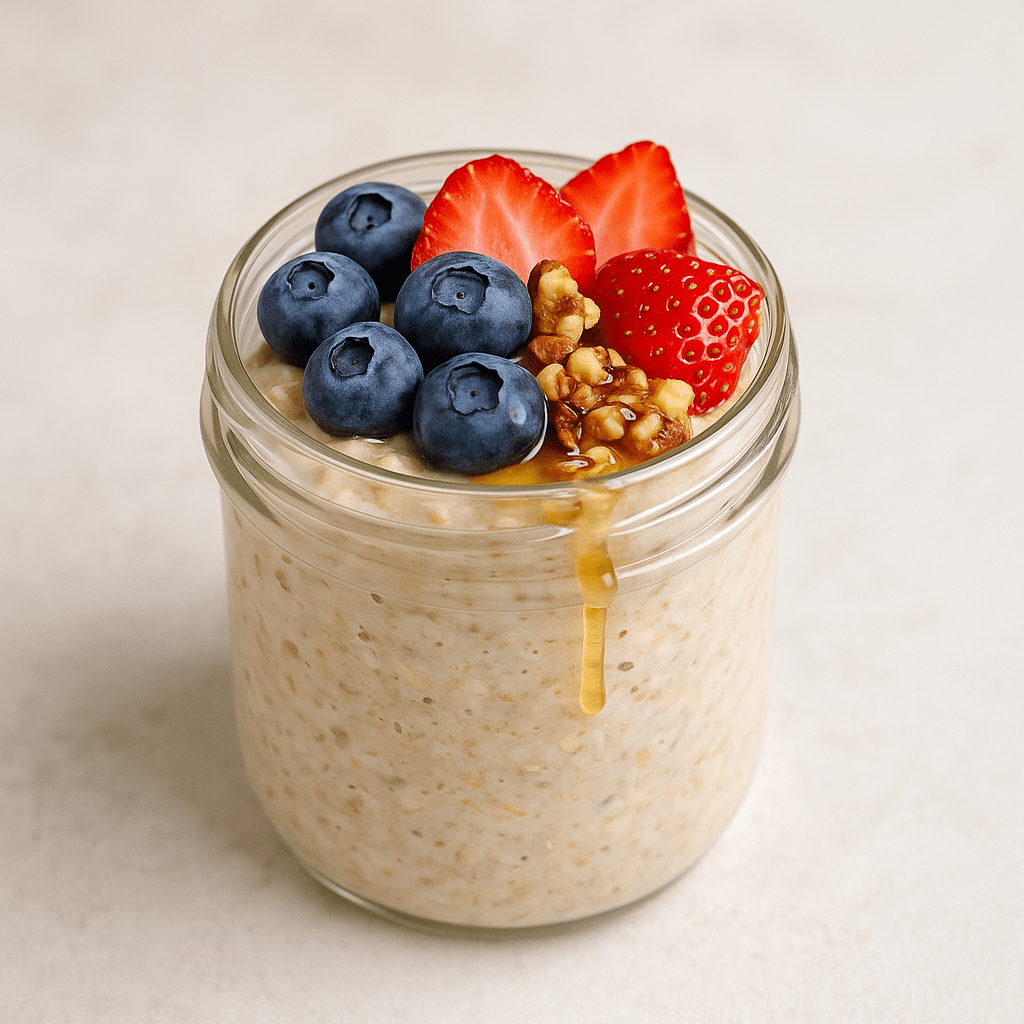
Overnight oats are the easiest no-cook breakfast — healthy, filling, and ready when you wake up. Learn how to make the perfect jar!
A simple, healthy start to your day
If you’ve ever wished breakfast could make itself, overnight oats are your new best friend. This no-cook meal preps while you sleep, saving you time in the morning and providing a satisfying, energy-packed start to your day. Whether you’re rushing to work or enjoying a slow morning, overnight oats are as versatile as they are nutritious.
🥄 Ingredients
½ cup rolled oats 1 cup milk (dairy, almond, oat, or soy) 1 tablespoon chia seeds (for thickness and fiber) 1 teaspoon honey or maple syrup (optional sweetener) ½ teaspoon vanilla extract (optional) Toppings: fresh fruit, nuts, or nut butter
👩🍳 Instructions
In a jar or small bowl, combine oats, chia seeds, milk, and any sweeteners or flavorings. Stir well, ensuring the oats are fully submerged. Cover and refrigerate overnight (or at least 6 hours). In the morning, give it a stir and top with your favorite additions — berries, bananas, almonds, or even a scoop of peanut butter. Enjoy cold straight from the fridge, or warm it up for 30–45 seconds in the microwave.
💪 Health Benefits
High in fiber for digestion and steady energy Rich in protein, especially when made with Greek yogurt or milk Full of complex carbs that keep you full longer Customizable — add fruits, spices, or seeds for endless variety
Pro Tip: Make 3–4 jars at once on Sunday night to meal-prep your breakfast for the week.
🌈 Flavor Variations
Berry Blast: Add blueberries, strawberries, and a dollop of Greek yogurt. Chocolate Banana: Mix in cocoa powder and top with banana slices. Apple Cinnamon: Add diced apples and a sprinkle of cinnamon before refrigerating. Peanut Butter Crunch: Stir in peanut butter and top with granola.
✅ Conclusion
Overnight oats prove that healthy eating doesn’t have to be complicated. With minimal effort, you’ll wake up to a creamy, delicious breakfast that powers you through your morning and sets a positive tone for the rest of your day.
Explore the Tao Te Ching by Laozi — an ancient guide to harmony, balance, and effortless living through Taoist philosophy.
Published on Substratum
Known as the wisest book ever written. It is said that you could read it in an afternoon, but you could study it for a lifetime.
🌿 Introduction
Few works of philosophy have influenced as many people for as long as the Tao Te Ching. Written over 2,500 years ago, this brief yet profound text continues to shape Eastern and Western thought alike. Its poetic reflections on balance, humility, and harmony have inspired leaders, artists, spiritual seekers, and scholars across centuries.
In this article, we’ll explore the history, authorship, and key ideas of the Tao Te Ching — and why its wisdom remains timeless.
📜 Origins and Authorship
The Tao Te Ching (道德經) — translated roughly as “The Classic of the Way and Virtue” — is traditionally attributed to Laozi (Lao Tzu), a semi-mythical philosopher thought to have lived in the 6th century BCE.
According to legend, Laozi served as a record keeper in the Zhou Dynasty court. Disillusioned by corruption and social decline, he decided to leave China, but before departing, a border guard named Yinxi recognized him and asked for his wisdom. Laozi then composed the Tao Te Ching — about 5,000 Chinese characters — and disappeared into the west.
While this story is likely apocryphal, the text itself emerged from early Daoist (Taoist) traditions that sought to align human life with the natural order of the universe. Scholars now believe the Tao Te Ching was compiled gradually between the 4th and 3rd centuries BCE, reflecting layers of oral wisdom and poetic thought.
📚 The Meaning of “Tao” and “Te”
Tao (道) means the Way — not just a path, but the fundamental order and flow of the universe. It is the source of all things, yet it cannot be defined or named. Te (德) means virtue or power — the manifestation of the Tao in the world through one’s actions, character, and alignment with nature.
Together, “Tao Te Ching” can be translated as “The Book of the Way and Its Virtue.”
🧘♂️ Key Themes and Philosophical Ideas
1. Wu Wei (無為): Effortless Action
One of the central ideas of the Tao Te Ching is wu wei, or “non-action.” This doesn’t mean doing nothing, but rather acting in harmony with the natural flow of things. True wisdom and effectiveness arise when one stops forcing outcomes and allows life to unfold naturally.
“The Tao never does anything, yet through it all things are done.” — Chapter 37
2. Simplicity and Humility
The text emphasizes simplicity, humility, and modesty as paths to peace and strength. The sage leads not through dominance, but by serving others and staying connected to the natural rhythm of life.
“The highest good is like water. Water benefits all things and does not compete.” — Chapter 8
3. Relativity and Paradox
The Tao Te Ching often uses paradox to challenge rigid thinking. Good and bad, strong and weak, high and low — these opposites define each other and cannot exist independently.
“When people see some things as beautiful, other things become ugly. When people see some things as good, other things become bad.” — Chapter 2
4. Return to the Source
A recurring theme is the return to one’s original nature — simplicity, stillness, and unity with the Tao. In this return, one finds peace beyond the turmoil of desire and ambition.
🪶 Structure and Style
The Tao Te Ching contains 81 short chapters, written in rhythmic, poetic form. The text blends mysticism, political philosophy, and personal ethics. Because classical Chinese is highly compact and ambiguous, translations vary widely — each revealing new shades of meaning.
Notable translators include Stephen Mitchell, D.C. Lau, Gia-Fu Feng & Jane English, and Jonathan Star, among others. Some emphasize poetic flow, while others focus on linguistic accuracy or philosophical clarity.
🌏 Influence Across Cultures
The Tao Te Ching has profoundly shaped Daoism, Confucianism, Chinese Buddhism, and even modern psychology and leadership theory.
Its ideas influenced Zen Buddhism in Japan, transcendentalism in the West, and even contemporary mindfulness movements. Thinkers like Alan Watts, Carl Jung, and Thomas Merton all drew on its insights into balance, paradox, and the nature of being.
💡 Modern Relevance
In an age of overwork, information overload, and environmental crisis, the Tao Te Ching offers a refreshing antidote. Its wisdom reminds us that strength lies in gentleness, and clarity in stillness.
Learning to flow with life rather than fight against it can lead to greater peace, creativity, and harmony — both within ourselves and with the world around us.
✨ Conclusion
The Tao Te Ching is more than a book — it’s a mirror for the mind. Each time you read it, its meaning changes, reflecting your state of being.
Its message is subtle yet universal: when we let go of control and return to simplicity, we rediscover the profound order of the Tao — the Way that flows through all things.
Short answer: a 32-hour (typically four 8-hour days) workweek can improve employee wellbeing and — in many trials — sustain or even raise productivity, but it’s not a universal fix. Industries, job types, and implementation details matter a lot. Below I lay out the main pros and cons, show concrete examples of countries and companies that have tried shorter weeks, and link to the studies and reports that support each claim so you can judge the evidence yourself.
What people mean by “32-hour week”
Most pilots and proposals refer to working 32 hours while keeping pay the same (i.e., no pay cut), often implemented as four 8-hour days or compressed/reshaped hours across the week. Sometimes “shorter weeks” refers to reduced hours with pro-rata pay cuts; the outcomes differ depending on which model is used.
Pros (what the evidence shows)
1. Better wellbeing, less burnout
Multiple large pilots report improvements in stress, burnout, mental health and work-life balance for employees who moved to shorter weeks. Iceland’s public-sector trials (2015–2019) showed large gains in wellbeing and broad satisfaction. The UK large pilot (2022) also found lower stress and higher life satisfaction among participants.
2. Productivity is often maintained or increased
Real-world trials repeatedly show that shorter weeks do not automatically reduce output — and in many cases output rose or stayed the same. Microsoft Japan’s August 2019 trial reported a ~40% increase in productivity (measured by sales per employee/time savings from meetings), attributed to fewer meetings, clearer priorities, and focus time. The UK pilot companies overall reported stable or increased revenue.
3. Recruitment, retention, and lower absenteeism
Companies that shorten hours commonly report easier hiring, lower turnover, and fewer sick days—important cost offsets for employers. The UK trial and several company case studies noted reduced resignations and improved recruitment metrics.
4. Environmental and operational benefits
Fewer commuting days and lower office usage can reduce electricity and carbon use (Microsoft Japan reported energy savings during its trial) and—depending on industry—operational costs.
Cons and caveats (what can go wrong or limit benefits)
1. Not equally feasible across all industries
Customer-facing services, healthcare, retail, and any 24/7 operation can’t simply close a weekday without hiring more staff or changing shift patterns—both of which can increase costs. Some firms in the UK pilot found sectoral limits and difficulty matching client expectations.
2. Risk of “work intensification”
If employers compress 40 hours of work into 32, employees may face higher intensity and longer workdays or be “on call” during the off day, which can increase stress rather than reduce it. Outcomes depend on whether productivity gains come from real efficiency improvements (fewer meetings, better processes) or simply pushing more work into fewer hours. Mixed evidence exists: some surveys show reductions in burnout but others (a Gallup-cited finding) note higher burnout in some 4-day configurations. Implementation details matter.
3. Uneven benefits across income levels and job types
White-collar knowledge workers often see big wellbeing/productivity gains; lower-paid shift workers may see smaller effects or need different protections (shift premiums, guaranteed hours). Trials with no pay cut are politically and financially easier to propose for salaried roles than for hourly roles unless employers adjust staffing or pricing.
Reorganizing workflows, training managers in output-focused performance, and communicating with customers takes time and money. Some firms decide not to continue after a short pilot because the change management was underestimated, or clients resisted the shift.
Concrete examples & evidence (who tried it and what happened)
Microsoft Japan (August 2019) — 5-week “Work-Life Choice Challenge”: offices closed on Fridays; Microsoft reported a ~40% rise in productivity (sales per employee) and big drops in meeting time and electricity usage. Employee surveys showed improved work–life balance. Critics note measures were short-term and context-specific. Iceland public-sector trials (2015–2019) — ~2,500 public-sector workers participated in trials that reduced hours (often to about 35–36 hours) with preserved pay; results showed maintained or increased productivity and large gains in wellbeing. This led to wide union agreements guaranteeing shorter hours for many workers. The Autonomy reports summarize the robust evidence. 4 Day Week Global pilots (UK, US, Ireland, others; 2022 onward) — coordinated multi-company trials (dozens to hundreds of companies) where most participants implemented a 4-day week with no reduction in pay. Reports show high rates of companies choosing to continue the schedule, improvements in employee wellbeing, and broadly neutral-to-positive effects on revenue and productivity. (See 4dayweek.com research hub and the UK pilot report.) Perpetual Guardian (New Zealand, 2018) — 240 staff ran a two-month 4-day trial and reported improved work–life balance and productivity—an early high-profile corporate test that helped popularize the idea. Government & city pilots — several governments/cities have trialed shorter weeks or four-day options (examples include Dubai; Tokyo has experimented with options to encourage workforce participation). National-level policy discussion is ongoing in many countries, with politicians and unions proposing 32-hour policies in some jurisdictions.
What the evidence means in practice — guidance for employers & policymakers
Design matters — keep pay the same if the goal is wellbeing and recruitment/retention; otherwise clarify trade-offs for staff. Many successful pilots used “no pay cut” as a baseline. Measure output, not hours — firms that shifted to output KPIs (clear goals, deadlines, fewer meetings) saw the best productivity outcomes. Training managers to judge results instead of face time is crucial. Pilot, evaluate, iterate — run sector-specific pilots with robust measurement (revenue, customer satisfaction, sick days, turnover, wellbeing metrics). The UK and US/Ireland pilots used rigorous before/after comparisons that other organizations can copy. Protect vulnerable worker groups — hourly, shift, and frontline workers need protections (e.g., guaranteed hours, shift premiums, cross-training) so reduced weeks don’t amplify precarity. Be realistic about sector limits — healthcare, emergency services, hospitality and retail may require staffing model changes (more hires or staggered shifts) that change the financial calculus.
Bottom line
Evidence from multiple countries and large coordinated trials suggests a well-designed 32-hour (four-day) workweek can improve employee wellbeing while maintaining or improving productivity — but success depends on how it’s implemented and the industry. It’s not an automatic panacea: without thoughtful redesign of work, there’s a risk of work intensification, higher costs in certain sectors, or uneven benefits across worker groups.
Check out the link below for an internal memo pdf you can give to your companies management team.
The snow leopard, often called the “ghost of the mountains,” is one of the most mysterious and captivating big cats in the world. Native to the rugged mountains of Central and South Asia, these elusive felines are perfectly adapted to survive in some of the harshest climates on Earth. Here are 10 fascinating facts that make snow leopards truly remarkable.
1. Masters of Camouflage
Fact: Their thick, smoky-gray fur is patterned with rosettes and spots that help them blend seamlessly into rocky terrain.
Fun Fact: This camouflage is so effective, photographers often spend days trying to spot one in the wild!
2. High-Altitude Specialists
Fact: Snow leopards thrive at elevations between 9,800 and 17,000 feet, breathing easily in thin mountain air.
Did You Know? Their lungs are 30% larger than other cats, helping them survive at high altitudes.
3. Incredible Jumpers
Fact: They can leap up to 50 feet in a single bound, ideal for hunting in steep terrain.
Fun Fact: That’s about 5 cars lined up bumper to bumper!
4. Long, Thick Tail
Fact: Their tails can reach up to 40 inches, helping with balance, communication, and warmth.
Fun Fact: They use their tails like blankets in freezing weather!
5. Solitary by Nature
Fact: Snow leopards live mostly alone, meeting only to mate.
Did You Know? A single snow leopard’s territory can cover hundreds of square miles!
6. Adapted Paws
Fact: Their large, furry paws act like snowshoes and protect their feet from ice-cold ground.
Fun Fact: Their paw pads are furry underneath to grip slippery rocks and snow.
7. Silent Predators
Fact: Snow leopards cannot roar. They communicate through growls, hisses, and mews.
Did You Know? This makes them some of the stealthiest hunters in the wild.
8. Wide Diet
Fact: They mainly hunt blue sheep and ibex but will eat birds, hares, and even livestock if necessary.
Fun Fact: Snow leopards can survive on a single large meal for several days!
9. Endangered but Protected
Fact: Only 4,000–6,500 snow leopards remain in the wild.
Did You Know? International efforts in 12 countries are helping protect these cats.
10. Cultural Significance
Fact: Snow leopards are revered in folklore, often symbolizing strength and agility.
Fun Fact: In some cultures, seeing a snow leopard is considered extremely lucky.
🐾 Conclusion:
Snow leopards are more than just beautiful creatures—they are incredible survivors, perfectly adapted to some of the planet’s harshest environments. Protecting them preserves not only a species but the delicate ecosystems of the world’s highest mountains.
About 13.5 billion years after the Big Bang, humans appear — one species among many. 100,000 years ago, at least six human species (including Neanderthals) existed. Homo sapiens were not the strongest, but they became the most successful due to intelligence and social cooperation.
Chapter 2 – The Tree of Knowledge
Around 70,000 years ago, the Cognitive Revolution began. Humans developed complex language, myths, and imagination. This allowed large-scale cooperation — a key advantage over other species.
Chapter 3 – A Day in the Life of Adam and Eve
Examines hunter-gatherer societies before agriculture. They lived healthier and often more balanced lives than later farmers. Early humans had intimate knowledge of nature and flexible social structures.
Chapter 4 – The Flood
Humans spread worldwide and caused mass extinctions of megafauna. This chapter highlights our early ecological impact and adaptability.
🌾 Part II: The Agricultural Revolution
(c. 10,000 years ago)
Chapter 5 – History’s Biggest Fraud
Agriculture changed human life drastically — more food, but worse individual lives. People became tied to land and repetitive labor. Harari calls it a “luxury trap” — food surpluses led to population booms but not more happiness.
Chapter 6 – Building Pyramids
Agriculture led to permanent settlements and complex social hierarchies. Shared myths (religion, kingship, laws) united large groups of strangers. Harari introduces the idea of “imagined orders” — belief systems that exist only because people believe in them.
Chapter 7 – Memory Overload
Writing was invented to manage growing administrative complexity. Early scripts tracked crops, taxes, and debts — not literature. Writing made collective memory possible and enabled bureaucracies.
Chapter 8 – There Is No Justice in History
Hierarchies (class, gender, race, caste) developed to maintain order. These systems persist through imagined legitimacy rather than biological necessity.
🌍 Part III: The Unification of Humankind
(last few thousand years)
Chapter 9 – The Arrow of History
Human societies gradually unified under larger political and economic systems. Three main forces drive unification: money, empires, and religion.
Chapter 10 – The Scent of Money
Money is the purest form of mutual trust — it allows cooperation without personal relationships. Unlike religion or politics, money crosses all cultures.
Chapter 11 – Imperial Visions
Empires spread ideas, technologies, and trade — often violently, but also by blending cultures. Harari treats empires as both destructive and creative forces.
Chapter 12 – The Law of Religion
Religions evolved to justify social and political orders. Polytheism gave way to monotheism, and later to humanism and secular ideologies.
Chapter 13 – The Secret of Success
Cultural evolution favors systems that increase cooperation and adaptability. Shared myths that promote unity — not truth — tend to survive.
⚙️ Part IV: The Scientific Revolution
(since 1500 CE)
Chapter 14 – The Discovery of Ignorance
Around 1500, people began admitting ignorance and seeking knowledge. Science flourished because humans valued what they didn’t know. Harari links science with empire and capitalism — exploration funded by conquest and profit.
Chapter 15 – The Marriage of Science and Empire
Scientific exploration served imperial expansion (e.g., navigation, mapping). Empires, in turn, funded scientific discovery — a self-reinforcing cycle.
Chapter 16 – The Capitalist Creed
Capitalism relies on credit and trust in future growth. Entrepreneurs and investors became new world builders. Capitalism and science accelerated global transformation.
Chapter 17 – The Wheels of Industry
The Industrial Revolution reshaped everything — production, energy, transportation. Harari calls it an ecological and social upheaval. Consumerism replaced religion as a source of meaning for many.
Chapter 18 – A Permanent Revolution
Modernity is defined by constant change and restlessness. Traditional values erode as economies and technologies evolve rapidly.
Chapter 19 – And They Lived Happily Ever After
Explores whether humans are happier today. Despite comfort and longevity, happiness has not improved proportionally. Mental distress and alienation remain widespread.
Chapter 20 – The End of Homo Sapiens
Humanity is on the brink of biological redesign — through genetic engineering, AI, and biotechnology. We may evolve into post-human beings. Harari ends with a profound question: “What do we want to want?”
🧭 Final Takeaway
Harari’s overarching message:
Human history is the story of how shared fictions — religion, money, nations, human rights — allowed us to cooperate, dominate, and now potentially transcend our biology.
But whether that makes us happier or wiser remains uncertain.
It’s amazing how far technology has come over the years. From the studio days with giant mixing boards, to the home studio in the new millennium where anyone can get a DAW like Protools or Logic so they can record, mix, and master their own music right from home (with a slight learning curve of course).
First things first, you’ve got to get an iPad (Amazon) if you don’t have one already. Owning an iPad gives you the convenience and versatility to create content on the go in any location around the world. While you may need an internet connection to upload and send content, much of the time you can create offline, whether you’re in the middle of nowhere, or on an airplane getting to your next destination.
Next, you need a digital workstation. There are a number of apps to choose from, but right now, I’m using Cubasis 3. Cubasis 3 comes loaded with virtual instruments and hundreds of preprogrammed drum beats to use. you can record these virtual instruments in a few different ways. Load one up with the virtual keyboard and play with the tap of your fingers. However, what I really like is that if you’re not all that familiar with keyboard voicing, you can switch to pads and it will automatically load some chords for you. This makes it really simple and fast to create great sounding chord progressions, especially if you’re not well versed with music theory. There is also a midi editor available to use if you would rather punch in some blocks.
It’s also wise to get some sort of interface that is compatible with the iPad. I use the iRig Pro Duo and it allows me to record two instruments simultaneously plugging straight into the iPad. I use one input for a guitar or digital piano, and the other for a microphone. The iRig Pro Duo has many awesome features such as having two built in preamps, and not to mention the portability aspect. For a more budget friendly but also very functional option than the Duo, check out the iRig HD X or the iRig 2. Not only can you use the iRig with Cubasis 3, but just about any music app you can think of on your iPad or iPhone! It even comes with some free apps, but if you want to keep things simple, you can record yourself with the normal iPad video recorder and upload that straight to YouTube or instagram.
If your just recording music alone, you can easily export the audio, or take it a step further by plugging it into a video editor app such as LumaFusion. The possibilities are endless!
Cereal has been a staple of the American diet for decades. I remember waking up on a Saturday morning as a kid, climbing up on the kitchen counter to get a box of Cheerios or Trix. Pour it in a bowl, and some milk and try to walk to the living room without spilling so we could watch some Saturday morning cartoons. Now in days however, we are much more health conscious and not only is it easier to find healthier foods, but they often taste better than their processed counterpart.
One of my favorite things to do before work was to bike ride down to Honolulu Coffee Company for breakfast I would get an Açaí bowl and a black coffee. This nutrient rich breakfast with healthy carbs would get me energized for my day of teaching. Açaís is not a super common thing to find so a yogurt bowl with fruit and granola is a great option as well.
If you want something healthier and tastier than cereal but with the same vibe. Just swap out the sugary cereal for some granola. Now you’ve got some whole grain oats for breakfast. Don’t stop here though. Add some blueberries and diced up strawberries for an amazing combination. The final step is to add a spoonful of peanut butter. This is a key ingredient to get your healthy fats and protein. Once you pour the milk in you can cut up the peanut butter into bite size pieces and they will stay separated.
There you have it! Take your cereal to the next level and enjoy for breakfast or a late night snack.
There’s a lot of buzz around the idea of manifestation now in days. Many people believe that the human brain is capable of much more than what is currently known. Although we experience life in three or four dimensions, scientists theorize there may be many more beyond our awareness. Your thoughts however will dictate the unfolding of your destiny. Extremely successful people such as Jim Carrey, Oprah Winfrey, and Conor MacGregor all attribute their success to visualizing their future to make it happen. In fact, Conor (amongst others) has said that the well known book on manifestation “The Secret,” by Rhonda Byrne has changed his life and made success not just a possibility for him, but enabled unthinkable success to come to fruition. Is there true science behind this “mind magic” manifestation or can we simply shrug it off as a confirmation bias? I read the book “Magic Mind” written by neurosurgeon Dr. James R. Doty and here’s what I found.
1. Be mindful of your thoughts and be intentional. Chapter one titled “Out of the Wreckage” clearly details imagery of what a manifested life can be. However, as you must be careful what you wish for, you must also consider what you are manifesting in your life. If you do not consider all aspects, your subconscious mind may bring to fruition a poisonous fruit creating a distopian reality. Referencing his best selling book “Into the Magic Shop,” the author tells the story of visiting a magic shop in his youth. He meets the shop owner’s mother who through her innate kindness offers to teach the young boy about neural pathways of the brain, neuroplasticity, and the ways in which you can use your brain to achieve a desired outcome. The boy makes a list of what he wishes for in life: a mansion on the water, a fancy car, etc. But you might have already guessed that although he was able to achieve these things later in life, these luxuries did not in anyway complete his identity or bring him long lasting happiness. This idea is exemplified by his mentor’s advice, “Compass of the heart. What you want isn’t always what you need. Those who hurt people are often those who hurt the most.” Blinded by his ambitions of wealth, he ended up neglecting and eventually losing what he now realizes is most important in life; a healthy relationship with his family. At the end of every chapter and sometimes in the midst, the author gives an exercise for you to mindfully practice your manifestation. Then at the end of the book there is a six week manifestation program to follow.
2. Be aware of what, when, and how your brain processes information. Your state of arousal can influence the effectiveness of your new thinking patterns within the subconscious mind. In chapter two “Networks and Vibrations,” Doty analogizes large neural networks of the brain to a top tier multi sport athlete and valedictorian he went to school with. These networks include the “default mode network (DMN), the central executive network (CEN), the salience network (SN), and the attention network (AN).” These networks, Doty explains, are what we want to take control of in our manifestation practices. He also points out the various ways we can study these neural networks such as fMRI, but does not disclose whether or not we can visually identify the process of manifestation through any of these medical examinations and extract empirical data to support the claims. What is found to be significant is that ‘“between stimulus and response there is a space. In that space is our power to choose our response. In our response lies our growth and our freedom.”’ This statement supports the most profound idea that humans have so much more control over our brains than we see at surface level. But if we want to take control of our thoughts, we must take control of our attention first. We must be cognizant of the brain activity that is hiding under the surface of the consciousness mind. DMN…. The Salient Network is outlined to be where the brain deciphers what is important information to consciously process. Dr. Doty states that the brain receives “somewhere between six and ten million bits of information per second, while only being able to consciously process about fifty bits per second.” The rest is believed to seep through into the subconscious and unconscious mind. It is not disclosed what type of information he is referring to, but one could logically infer it is information coming from all of the senses like touch, taste, etc. However, I am left to wonder what other types of sensory input are salient to human beings such as electromagnetic or other types of energy that breezes past the consciousness mind right into the unconscious. Understanding this neural network is relevant to manifestation practices because if we can choose to direct our attention in the areas of our lives that we want to change, the unconscious mind can be reprogrammed to focus on the information that we want. The main takeaway from chapter 2 is that the brain is better prepared to make decisions when in a relaxed state as apposed to a heightened fight or flight state. Finally at the end of the chapter Doty invokes the idea of quantum coherence to support the idea that everything in the universe is one and that “each part inescapably affects and is affected by all other parts.” I see this to be a mind blowing statement and I am fascinated by claims like this. Yet who knows if research in the quantum field will ever reveal data to support such claims? Lastly, Doty explains the significance of the hearts electromagnetic field and the idea that the heart can have more of an effect on the brain than the brain does with the heart. This idea resonates with me as I am reminded of the biological psychology class I took long ago as an undergrad where we learned that it is not just the brain that affects the body, but the body can invoke significant changes within the brain as well.
3. In chapter 3, step 1 is “Reclaim Your Power and Focus Your Mind,” Doty explains how most people underestimate how their cognitive abilities can affect events that unfold in their lives. He says that we often misconstrue events as “happening to us, not motivated by us- and certainly not happening for us.” If we do not take control of what we think, or mind will be hijacked by detrimental thoughts of our own and persuasions from the countless people in the world that want to take advantage of you. From constant advertisements to social media addiction, if you are not cognizant and focused you may end up in a metaphorical quicksand. In order to take control, we must develop a “sense of agency.” This sense of agency lets our body analyze the effectiveness of our movements. To exemplify this, Doty tells the story of a patient whose arm was paralyzed. The patient is asked to move her arm and although she attempts to but does not, her sense of agency has convinced her that it happens because of its predictive aspect. Therefore, it is concluded that this sense of agency can be applied in anticipation to the body’s movement. Doty proceeds to explain that many people suffer from the opposite of this patient’s anosognosia, where our subconscious thinks we are paralyzed from some sort of action when instead we are fully capable of it and capable of much more than we originally think. Next, Doty explains the the importance of taking a step back from our thoughts and analyzing them. This is something that I believe to be important in interpersonal exchanges. Taking time to think before responding emotionally will be beneficial at any situation. Doty likens this analysis to a speeding train running to the end of the tracks. If we are on the train we cannot respond effectively, but if we watch the train while standing safely on the platform, we can more effectively respond to the situation.
4. We begin step 2 in chapter 4 which is “Clarify What You Truly Want.” This chapter begins with a story that exemplifies the importance of visualization. A man and his mentor stare off at the pacific horizon as the one prepares himself mentally for trip in a double haul canoe from Hawaii to Tahiti; without the aid of modern navigation equipment. Although he cannot see the islands that are 2,000 miles away, he can visualize them in his mind. The lesson to be learned from his mentor is that if you lose the vision, you will lose your way. Next, Doty explains the importance of reflecting on positive memories. He says thinking of these memories can influence your mind to recreate positive emotions like “wonder, awe, interconnectedness, gratitude [and] inspiration.” Experiencing these positive emotions can tap into the Salience Network previously discussed. The idea is that once ingrained into the subconscious mind, these positive emotions will become positive behaviors. Even imagined success can yield positive result. If it is done with enough focus and repetition and if we truly feel these imagined emotions of success, it will overcome the negative thinking habits that keep us stuck in the mud. Next, the two types of happiness are discussed. Hedonic, known for instant satisfaction and eudaimonic, which is living a meaningful life. Doty elaborates on the connection between these two types of happiness and the bodies immune system response. Basically, those who report hedonic happiness often had chronic inflammation. This coveys the significance of social relationships on the physical body and that we should seek to cultivate healthy social relationships in our lives.
5. Step 3 beginning in chapter five is to Remove the Obstacles in Your Mind. Once again we will focus on controlling our attention. If we avoid being overcome by our emotions, and rather observe them without immediately reacting, we can more sufficiently direct our attention to manifesting that which we desire in life. Fear is a specific emotion that we need to control as we’ve previously learned about the fight or flight activation. When we are in a state of fear, the Salience Network identifies the troubling experience as important and takes the focus away from the things you truly want in life. What exacerbates this problem is that humans have an evolutionary cognitive bias to focus on the negative things in life. While in the past, this would have been helpful to protect ourselves from predators, it has snowballed into negative self talk in the modern world. This negative self talk clouds our vision of happiness as well as the possibility of others to see us as happy, inviting, and successful.
6. Step four in chapter six is really what I think this book is all about: “Imbed the Intention in Your Subconscious.” If you’ve been paying attention to pop culture in the past decade, you might have seen that actor and comedian Jim Carey has had a spiritual awakening. But this is not the focus for this chapter. Instead, Doty starts chapter six by telling the story of Carey’s childhood struggles like his dad losing his job and having to live in a camper. This left him with a negative view of the world, but he eventually overcame this and utilized positive thinking to change his life. When starting his comedy and acting career, he was not discouraged by failure. On the contrary, it appears that his positive thinking had manifested his own success. He would drive to a certain place at night, look out over the city, open his arms wide and exclaim that he is a great actor and all the directors want to work with him. He went so far as to write himself a 10 million dollar check and kept it in his wallet for years as a reminder of where he was going in life. It wasn’t long after that he had multiple movie offers and became one of the biggest stars of the 90’s. One of the reasons that consistency is so important with manifesting is that the brain limits energy output. The brain is designed to encode and remember important information, and forget what is not useful to us. If our goals are not consistently processed into our subconscious, they will be completely forgotten. Doty analogizes the brain to an iceberg when what is seen in the conscious mind is about 10 percent of the brain’s processes, and 90 percent is hidden underwater within the subconscious and the unconscious. That 90 percent of the mind below the surface continues to operate and direct while the conscious mind is focused on other tasks. Doty analogizes the subconscious to a filing cabinet and bloodhound where the bloodhound seeks whatever we file into our mind’s cabinet. If there are negative thoughts in our filing cabinet, we will naturally seek negative experiences through our subconscious. However, if we supply our filing cabinet with positivity, we will naturally seek positive experiences in life. Next to discuss is flow state. Flow state is important for manifestation because it deactivates certain inhibiting parts of the brain and opens the door to the subconscious. For a good book on flow state, check out Flow: The Psychology of Optimal Experience. When you are engaged in a state of flow, time seems to slow down and the focus is on nothing. But what is happening in the moment? Picture an elite athlete such as a basketball player driving to the hoop, or an Olympic figure skater executing that perfect routine. Doty explains that “the paradox of flow is that you are going toward the goal but the goal is irrelevant.” All of the extraneous stimuli, thoughts, and worries about tomorrow disappear. This is significant as we have already learned the importance of avoiding a heightened fight or flight state to manifest most effectively. The placebo effect is also mentioned here. Studies have found that when a patient is given a sugar pill, but told it is life saving medicine, the mind’s belief that it will heal induces actual healing within. This can be extrapolated to manifestation where our mind’s beliefs can lead to radical changes in our lives.
7. In chapter seven, step five is to “Pursue Your Goal Passionately.” It begins by reminding us to always stay the course, never doubt yourself, and know that manifestation takes time. Baby steps will get you to where you want to go. I’m reminded of the Taoist quote that “a journey of a thousand miles begins with a single step.” When the wind is blowing and the waves are crashing overhead, stay the course and trust in yourself to succeed in all of the challenges you face! Next, consider the social connections you’re making on a day today basis. You don’t need to strive for your goals alone. Creating positive social situations will keep you and your allies relaxed. Relaxed in the state necessary to stay within the manifestation process. You can help others as they can help you. Doty proceeds to once again reference Jim Carey’s transition into stardom. Carey knew he wanted to be successful but didn’t know what his audiences wanted. One night, he finally realized that the people who were there to see his comedy routine simply wanted to be free from concern. He then personified this idea and became that free person on stage which would bring relief and happiness to his audience members. This persona would eventually evolve into the character Ace Venture which was a breakthrough role in his acting career. So the success didn’t just come from his talent for comedy. He aligned his life goals with a greater purpose. In this case, the purpose was to relieve others from suffering. Carrey is quoted as saying ‘“ The effect you have on others is the most valuable currency there is.”’ I agree with this statement wholeheartedly and see that aligning your passion with a greater good can dramatically increase your successes. Lastly, trust in yourself to reach your goals. Doty describes an instance where a patient’s life was in his hands during surgery. It was very possible that the patient could slip away and there was panic in the room. However, Doty trusted in his subconscious abilities to guide him; perhaps even entering a state of flow to lead the surgery team to success.
8. The final chapter leads us to step six: “Release Expectations and Open to Magic.” Often times the path to your goals will not look as you initially envisioned. What looks like failure at first might change your course and lead to success. Doty tells the story of a woman who desires to travel to the Amazon to do humanitarian work and protect the rainforest, yet she has too many responsibilities in her current role with a hunger project. Next thing you know, she catches malaria and it changes the course of her life forever. Due to the months she needed to take off work through numerous misdiagnosis, she was not needed as much in her current role and that enabled her to eventually follow her dream of working in the Amazon. Doty then describes his numerous projects at work such as the Stanford Center for Compassion and Altruism Research and Education, a World Compassion Festival, and an international Compassion Corps. On a personal note, I think these endeavors may be worth researching, and also made me think that there is much in the world to be accomplished if we are innovative, dedicated, and take the risks and initiative to put forth such projects. The point is however that we should not get stuck on the outcome of any single result. Doty says that among his many projects, some will not be completed or yield the intended results, some will, and some take more time than originally thought. Doty explains that when he is overwhelmed, he uses a mnemonic he came up with to reset his mind. He uses CDEFGHIJKL for Compassion, Dignity, Equanimity, Forgiveness, Gratitude, Humility, Integrity, Justice, Kindness, and Love; focusing on one at a time and what they mean to him in his life. Considering gratitude, Doty discusses the importance of utilizing it in everyday life. He describes a study where patients who wrote letters of gratitude show long lasting changes in the brain, specifically in the medial prefrontal cortex. This is another way that we can take the focus of the mind away from negative experiences and open it to the positive experiences we want to see in life. Finally, a reminder is given on how past experience both good and bad shape who we are. The art of kintsugi dates back to the fifteenth century Japan. When a bowl is broken, it can be sealed back together with resin. Gold or silver shavings can be added to the resin to make the repairs aesthetically pleasing. This practice metaphorically represents how the mental scars of the past can build the spirit and make a person into a piece of art; even more grand than they were prior to breaking.
Kintsugi
Doty concludes the book by telling how different his current life is now and how he has filled it with love and many reminders of staying true to his hearts compassion (such as a headless Buddha statue). He makes a profound statement that “only when we believe we are enough in ourselves do we find the ability to contribute to life, but only on contributing to our world do we discover we are inherently enough.”
This book proved to be an interesting read that balanced some scientific data with the untestable theories of manifestation. I found the numerous anecdotes of people struggling in life only to pull through their situations with manifestation techniques and sheer perseverance to be both fascinating and inspiring. Two of the main take a ways from this book for me include: The concept of positive thinking, affirmations, and expressing gratitude. This is a habit that I TrueType believe can change a persons life. Next, the subconscious mind is like a reservoir filled with thoughts and information that may in some form bubble to the surface and materialize in reality. This is perhaps where the Freudian slip comes from. By filling the subconscious mind with thoughts that align with your life goals, it will condition the mind to both seek and be prepared to accept these circumstances when the opportunity arises. Therefore, be careful what you think because your thoughts may become your reality. The book ends with a six week program to master manifestation which I have not completed yet so check back at a later date for updates!
Was there really magic revealed within the pages of this book? Well I guess it depends on your interpretation what magic truly is. So don’t just take my word for it. Grab a copy of “Mind Magic” by Dr. James Doty and find the magic for yourself!
There are certain thing can always go together in this world with no question about it. This may include peanut butter and honey (yes, swap that high fructose corn syrup for some grade A natural honey or preserves), Avocado and Jalapenos, or one of my personal favorites Bacon and Avocado. For any breakfast you should incorporate a healthy balance of protein, carbs, fats, and vitamins. I personally like to put a spin on the classic BLT for a superbly delicious meal.
——————————————————————–
Ingredients:
Wheat bread
Bacon
Avocado
Romain hearts, gourmet lettuce, or spinach
Tomato
Eggs
Cheese sliced
Mayonnaise
Optional: Hollandaise, hot sauce
——————————————————————
Time to put it all together. Get that bacon sizzling and add some black pepper to taste. I usually cook the whole pack and stick the leftovers in the fridge for tomorrow. Prepare your lettuce, slice your tomato and avocado, and toast that bread. You can use the leftover bacon grease to cook those eggs. I usually do the over easy. Spread some natural mayonnaise on one or both of the toast. Add avocado, cheese, bacon lettuce, tomato, egg, and voila! A delicious breakfast that will keep you happy and full until lunch.